In addition to the Basic Project it is also possible to create a prototypical Experiments project. The idea behind this project type is to divide the work of the analyst into a number of areas, which facilitate the iterative process of model building. In this prototype the following areas have been singled out:
working with data - covers the selection of the database and data sets
working with attributes - assists in data exploration and variable selection
working with the model and test results - assist in modelling results management and in evaluating and comparing models
The project type supports the iterative nature of the model building process and lets the user define custom work areas.
Currently only one type of Experiment is available: the Classification experiment. Its idea is to support the consecutive tasks involved in building a classification model (with the use of the logistic regression algorithm by default).
In order to start working with an Experiment project the user should create a project by selecting the New Project... action in the file menu and selecting Experiments as the project type. After the new experiment is created, a new object appears in the Projects window. This object contains special elements, corresponding various types of tasks, which help organize the work with the model.
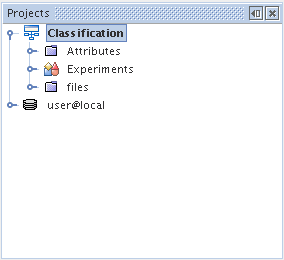
Attributes - covers the tasks related to attributes. The provided tasks assist the user in data exploration using the Freq component and in simple variable selection by restricting the data set to the selected variables (active sets).
Experiments - covers the tasks related to model building and modification, as well as with assessing the quality of the model. This object stores the settings and subsequent models.
files - this is a directory which stores the scripts for initializing and organizing the whole process; this directory covers the functionality of the iterative model building process, as well as work organization and the division of tasks into areas. In this version of the system this area is more of a prototype.
The simplest way to initialize all the parameters and build a model
is to run the whole experiment as a whole. This is done by choosing the
Execute action from the context menu (or pressing F6).
This opens a sequence of windows in which the user is asked for the
necessary settings: the repository, alias, sets to be modelled and target
settings. After these settings are executed, a database will be added to
the project and in the Experiments area the necessary modelling support
objects will appear, together with a 'package'
 containing all the
information about the model and test results.
containing all the
information about the model and test results.

After viewing the model and test results the user can decide whether
the model is worth saving for future analyses or maybe it is
unsatisfactory and will not be considered later. In the first case, the
user can save the model by clicking on the
 icon on the top toolbar (or by pressing Ctrl - =). This will permanently
add the 'package' to the project. The name of the object will
change color from green (denoting a modified object, which has not been
added to the project) to black. Otherwise, if the model is deemed useless,
the user does not have to do anything. The next time the experiment is
executed the package will be overwritten.
icon on the top toolbar (or by pressing Ctrl - =). This will permanently
add the 'package' to the project. The name of the object will
change color from green (denoting a modified object, which has not been
added to the project) to black. Otherwise, if the model is deemed useless,
the user does not have to do anything. The next time the experiment is
executed the package will be overwritten.
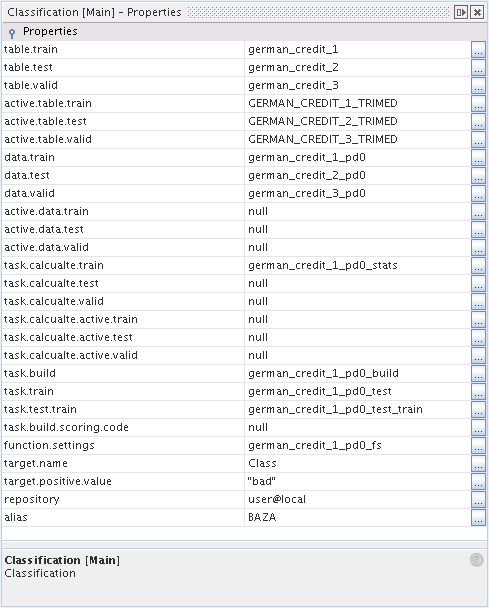
After the experiment is executed for the first time the user can access all the objects required for modelling, including the algorithm settings. By altering the settings and using the tasks available in Attributes it is possible to build consecutive models and add them to the project. In this way the user can create a custom set of models for further analysis. The current settings of the algorithm can be controlled in the Properties window.
After creating a series of models the user can compare their quality. In order to do this, select the models of interest and choose the model comparison task from the context menu (Context Scripts). This will generate a report with a comparison of model parameters and basic statistics. Moreover, the project's context menu also offers the options of generating the comparison of various model quality measures, such as lift plot or accuracy.

The Dictionary is another element of the experiment, which aims to organize the work in the system in a manner imitating the real work of the analyst. The dictionary is a kind of a notebook, in which the analyst can write notes and observations about particular variables. Thanks to this, during each stage of work key or alarming information about the considered attribute can be accessed.
In order to access the dictionary, choose the Dictionary command from the Window menu. To create a note about a particular variable open any component which contains the list of variables (physical data view, model signature or parameters, table structure view, etc.), select the variable, go to the Dictionary window and enter the contents of the note (see the movie). The notes will be visible whenever the name of the particular variable is selected.
Note
The Dictionary is always bound to the main project. This means that to access the dictionary the project (experiment) on which the user is working at the moment has to be set as the main project. This can be done by selecting the Set main Project command from the context menu.